Install and configure Eclipse for AEM on Windows 10
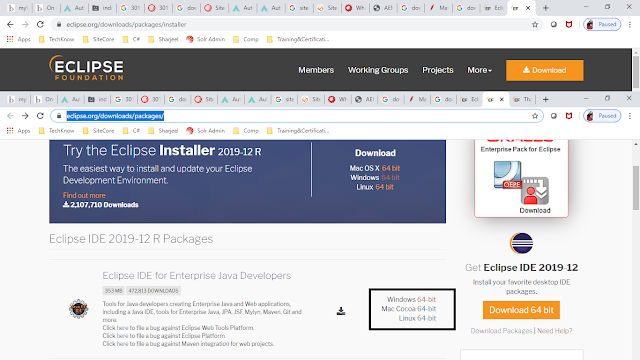
Step 1 : First you get the source package from URL https://www.eclipse.org/downloads/packages/
Download Eclipse IDE packages for windows or required OS compatible package.
Step 2 : After downloading the zip file please unzip this package at desired location. In my case I unpack it .

Step 3 : Now click on executable file available in Eclipse unzipped package. In few seconds you will get a popup having Eclipse start screen on your system.

Step 4 : Select or create your work space which is having code to connect JAVA source with AEM.
In my case I created it on my system and creating a test AEM app.

Step : 5 After selecting your work space default or welcome page of Eclipse will open having all available options.

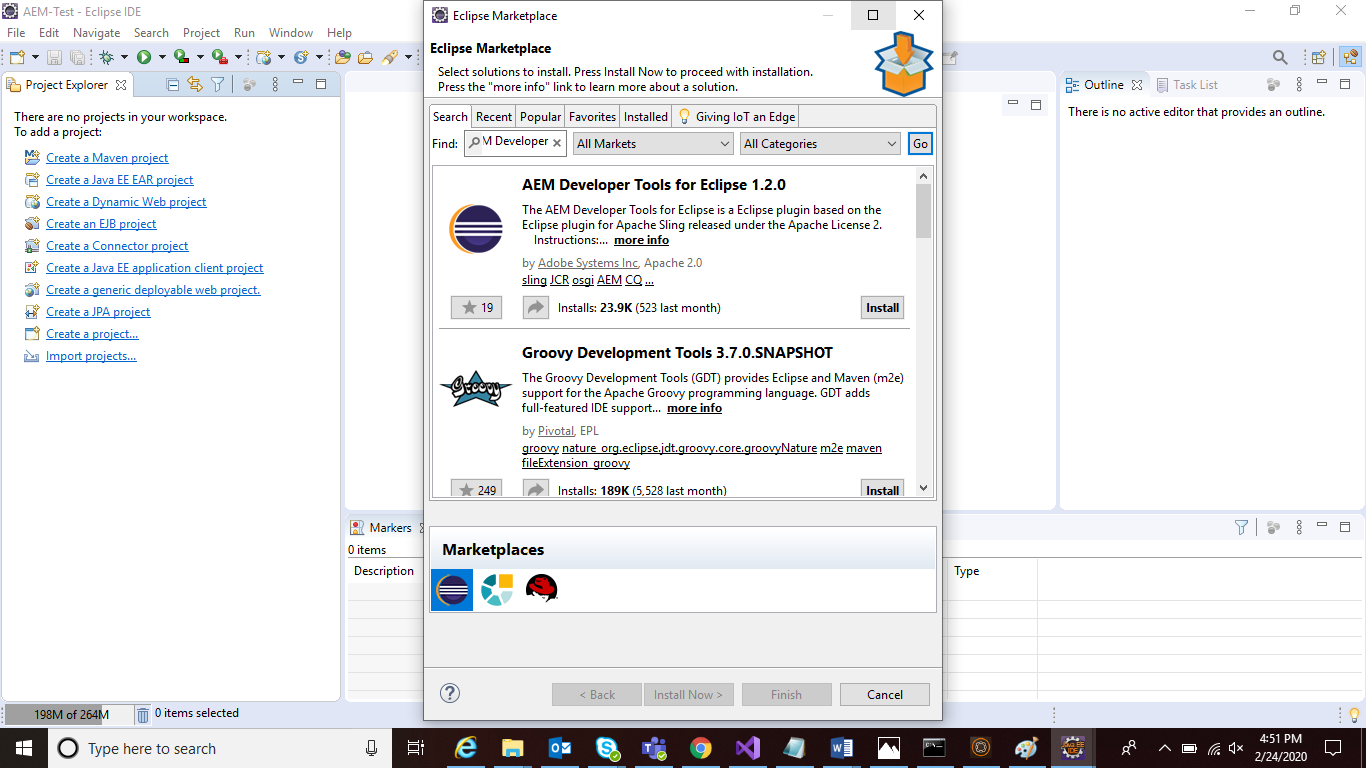
Step 6 : In next step you need to integrate AEM development tool kit in your Eclipse. To do that just go to Help and select Eclipse Marketplace then type AEM Developer tools for Eclipse. On screen you will get the required developer tool now install it in eclipse.

After installation of developer tool you just need AEM libraries to start your work on AEM with integration of Java source code on eclipse.
Happy Learning !!!
Download Eclipse IDE packages for windows or required OS compatible package.

Step 2 : After downloading the zip file please unzip this package at desired location. In my case I unpack it .

Step 3 : Now click on executable file available in Eclipse unzipped package. In few seconds you will get a popup having Eclipse start screen on your system.

Step 4 : Select or create your work space which is having code to connect JAVA source with AEM.
In my case I created it on my system and creating a test AEM app.

Step : 5 After selecting your work space default or welcome page of Eclipse will open having all available options.

Step 6 : In next step you need to integrate AEM development tool kit in your Eclipse. To do that just go to Help and select Eclipse Marketplace then type AEM Developer tools for Eclipse. On screen you will get the required developer tool now install it in eclipse.
After installation of developer tool you just need AEM libraries to start your work on AEM with integration of Java source code on eclipse.
Happy Learning !!!


Comments
Post a Comment